


-
Recent Posts
Recent Comments
- jnpotts on Adding USB to a Xoom dock
- jay on Adding USB to a Xoom dock
Archives
Categories
Meta
There are a number of sites showing how to modify a Xoom dock to add a usb connection, but my method is a little different.
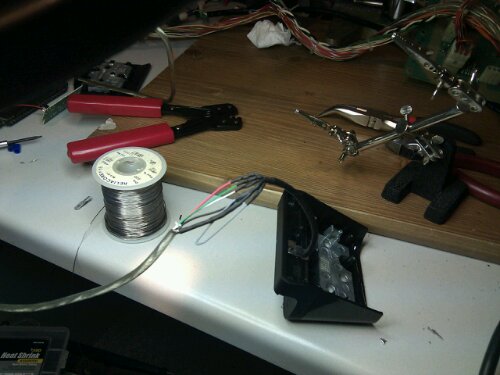
You need a sacrificial USB cable, a T6 torx screwdriver, some heat-shrink tubing, and a zip-tie. I won’t go into all the details about opening the dock, etc, since you can find them easily enough. If you know nothing about USB, and haven’t read any other instructions, hit the google and read up.
Onward!
First off, I don’t care about “reversing” this mod, because I’m never going to plug speakers into the dock at the expense of losing my USB connection. So the first thing I did was to de-solder the audio jack from the circuit board. This leaves a nice, clean factory hole in the back of the dock for the USB cable.
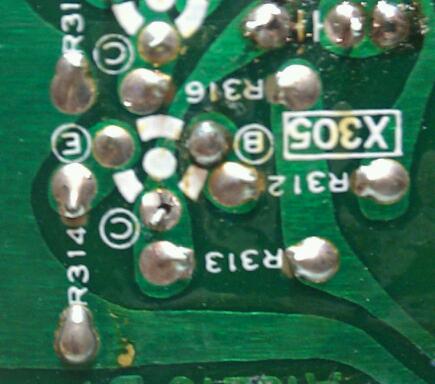
In this picture, you can see the empty spot in the bottom right of the pcb where the jack used to be.
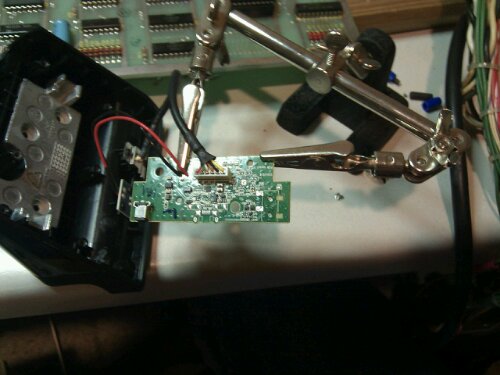
Next, I de-soldered the USB header from the pcb (the white connector). After the header was loose, I popped the contacts out of the white shell. After taking a close look at them, I realized that the tabs that hold the pins in place inside the shell are the perfect size/shape for crimping. In this picture, you can see where I’ve already crimped the red wire. If you look close, you can see the tabs on the other connectors. I’m afraid my Nexus isn’t the best for macro shots.
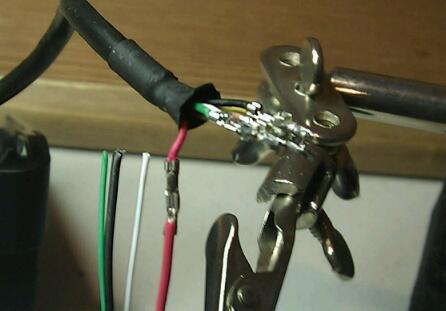
Note that I slipped some heatshrink over the new wires before crimping them. This next photo shows the new connections nicely covered with heatshrink tube.
I put a zip tie around the new cable, just past where the outer sheath begins, for strain relief. At that point, I just had to put the dock back together.
If you’re wondering why I went to the trouble of crimping the connections, instead of just splicing them and soldering, you generally get a better connection with a crimp, and you never have to worry about a cold solder-joint. Plus, making a crimp is generally faster.
Finally, you might have noticed that I have a small loop of gray wire in photo 3. I originally planned on making my dock be an OTG dock, so that gray wire is jumping between the brown pin and ground. But, if the xoom is in OTG mode, it doesn’t connect to a PC. I decided that I’d much rather have a xoom-to-pc dock than an OTG dock, so I snipped the wire. If I ever change my mind, I can just open the dock, and splice the wire back together. Or mount a toggle switch, which would be extra spiffy.
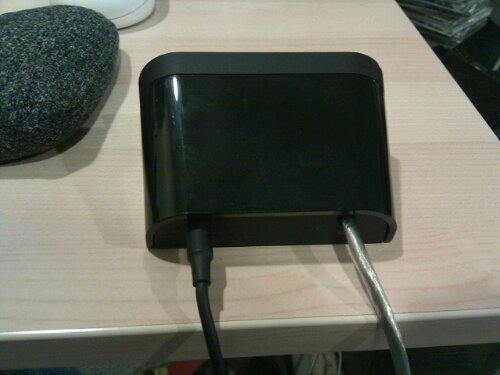
And here’s the finished product. It would have looked nicer if I had used a black USB cable, but I had a bunch of shiny USB A-B cables that I have no use for any more. At least I used the silver one instead of the metallic purple (I kid you not — they were cheap).